

PAPER PIECING FINE POINTS
These are my suggestions for faster, easier, and better paper piecing.

Chain Piecing
Chain piecing saves time and thread. Just slip the next seam to be sewn under the presser foot before cutting the thread and removing the section before it. When the first section is clear of the presser foot, you can clip and remove it. Better, work in long chains, sewing several seams before cutting the thread and beginning a new line of chain piecing.

Minimum Seam Allowance
You've added the fabric, flipped it open and found the seam allowance short on one side or at a corner. In my opinion, 1/8" (3mm) is enough seam allowance if you're using a good woven cotton and your project will end up on a wall. If the project will be part of a heavier, larger quilt that will see use, 3/16" (5mm) would be my minimum seam allowance.
For Smoother Points
For the cleanest points, start at the wide end of a triangle and sew TOWARD the point whenever you can. This avoids sewing over the previous seam at the start of the point, which can lead to a wobbly seamline and a fat point.
Pressing while paper piecing
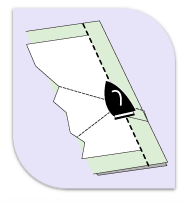
Always use a dry iron for all stages of paper piecing.
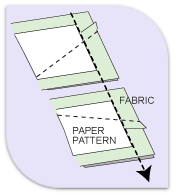
1) Add a piece of fabric to a section.
2) After you have removed it from the machine, trim the seam allowance.
3) Turn the section paper-side down (which is fabric side up), and PRESS the line of stitching that you just made.
4) Open out the added fabric and GENTLY press the seam flat from the right side. Do not pull the fabric or stretch the seam while pressing.